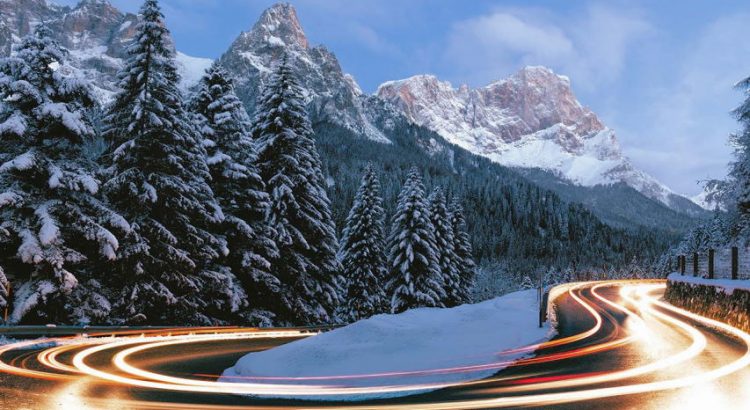
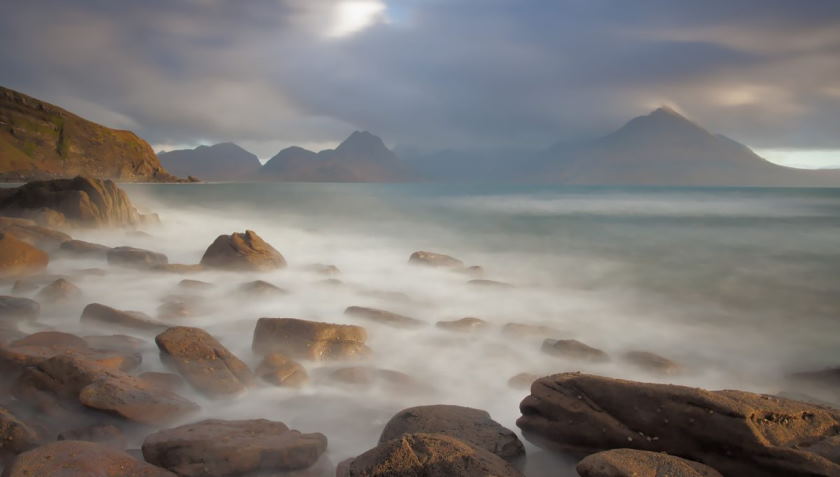
Have you ever looked at a night sky photograph and wondered how the stars appear as streaks of light? Or seen a photo of a river with the water looking smooth and silky, almost like it’s in slow motion? These are examples of long-exposure photography, where the shutter is open for an extended period of time to capture a scene.
If you’ve ever wanted to try your hand at long-exposure photography but needed to know where to start, this beginner’s guide is for you. We’ll cover everything from what equipment you need to how to set up your camera for long exposures. So grab your tripod, and let’s get started!
Tips for mastering long-exposure photography
- Use a tripod: Long exposures are all about keeping the camera still for an extended period, and a tripod is essential. Investing in a good quality tripod can help you achieve sharp images with minimal blur.
- Adjust your shutter speed: Depending on how much blur you want to capture, you can adjust your shutter speed accordingly to create the perfect exposure. For example, a slower shutter speed will result in more motion blur, while a higher shutter speed will freeze motion.
- Work with filters: Filters can manipulate light and enhance long-exposure photographs. Neutral Density filters reduce the overall amount of light entering the lens, allowing for longer exposure times without overexposing the image. Circular polarizers can also reduce reflections and glare, while graduated ND filters help balance exposures across bright and dark areas in the frame.
- Use a remote release: Pressing the shutter button manually can cause camera to shake, leading to blurry photos. A remote release is a great way to fire your camera without actually touching it, eliminating any chances of blur due to movement.
- Experiment with exposure blending: This technique involves taking multiple exposures at different shutter speeds and combining them in post-production for an even more dynamic look. This allows you to capture motion blur in one exposure and freeze motion in another – all within the same photo!

- Utilize your histogram: A histogram is a great tool for judging exposure. It can help you identify potential photo problems and make adjustments before committing to the final shot.
- Check your camera settings: Make sure you’re familiar with your camera’s settings and functions before shooting long exposures, as several variables need to be considered. For example, double-check the aperture, shutter speed, ISO, image stabilization mode, and white balance before taking a photo to ensure optimal results.
- Take test shots: Before committing to the full shot, it’s always a good idea to take some test shots first to check for any issues or imperfections in the scene. This will give you an idea of how your final image will look and allow you to make any necessary adjustments before completing the shot.
- Use a cable release: Cable releases provide even more control over shutter speed, allowing you to adjust it in finer increments than with a remote release. This is especially useful when shooting long exposures at night or in low-light conditions.
- Have fun: Above all else, experiment with long exposure photography! Don’t be afraid to try different techniques, filters, and settings until you find something that works for you and your creative vision. Then, with patience and practice, you can really create some stunning images!
Create art with long exposure photography
Long exposure photography is a creative and exciting way to capture stunning images. It involves taking multiple shots of the same scene over an extended period, allowing time for movement and light changes to create beautiful photos. In addition, long exposure photography offers a unique way to illustrate motion, depth, and atmosphere within an image, often resulting in surrealistic scenes that are truly captivating.
You’ll need a DSLR camera with manual settings available to get started with long exposure photography. First, you’ll want to select a low ISO (100-400) to avoid overexposing the shot due to long exposures. Then choose your shutter speed — typically, 1/4th or less of a second is perfect for capturing anything from waterfalls and clouds moving in the sky to light trails from cars and stars twinkling in the night sky. You’ll also want to ensure you have a tripod for your camera, so it won’t move or shake during long exposure shots.
When creating art with long exposure photography, experiment with different shutter speeds and lighting sources to get unique results. Consider using colored gels or filters over your lens to create intriguing effects. Play around with composition as well — include foreground environments such as trees or rocks and detail-rich backgrounds like skies and waterfalls. Finally, don’t forget to take multiple shots of the same scene; this will give you a greater range of artistic options when editing later on!
Long exposure photography is an incredible way to create beautiful and unique art. With a little practice, creativity, and patience, you can create stunning images of the world around you. So have fun experimenting, and enjoy capturing your art!
Happy shooting!


